Web App 
The basic functions of the web application are:
- managing users,
- calling from browser,
- creating, editing, and translating trainings,
- Adding resources (3D models, images) to display to the operator.

Log into the app, creating and editing users
To log in to the app go to the https://< server url > page and enter your login details.
In the upper right corner you can change the displayed language.
How to add a new user?
-
Go to the Users tab
-
Click + Add User The user creation form will appear on the right.
-
Fill in the data and click ADD USER

Passwords should contain three of the four-character types:
- Uppercase letters: A-Z
- Lowercase letters: a-z
- Numbers: 0-9
- Symbols: ~`! @#$%^&*()_-+={[}]|:;"'<,>.?/
Registration request (new user)
A new user can ask the administrator to create an account. New user can do this from the login page.
How to ask for registration?
-
Go to https://< server url >. You will see a login form.
-
Click Registration request
You will be taken to the account creation page.
-
Fill in all the details and click Send Request
The new user's request will be sent to the administrator. Once your request is approved by the administrator, you will receive an email notification.

Registration request (administrator)
The administrator can accept or reject a new user's request to create an account

How do I accept or decline a registration request?
-
Go to https://< server url > and and log in to your account. Then go to the Users tab.
-
Change the switch button from Users to Requests.
You will see all requests from new users.
-
To the left of the user data you will see two icons - refuse and accept.
The user will receive an email notification of your decision.

Before you grant a user access, you must assign a role (admin, user or editor).
To assign a role to the user who sent the request, click on his/her details and then click Edit. Select the role of the user and click Save.
Calling
The Aidar.Service Web App allows you to initiate a connection to an operator from your browser.

How do I connect to an operator from the Aidar.Service Web App?
-
Go to the Users tab.
You will see the full list of contacts.
-
Click on the handset symbol next to the contact you would like to call.
It will start calling the operator.
Status
| Icon | Status |
|---|---|
| Active | |
| Online but temporarily unavaible | |
| Busy | |
| Offline |
Adding a training
From the web app you can add or edit trainings displayed on MR glasses.

You can also edit the training from the MR App by selecting the gear icon. (see section 2.10).
How do I add a workout to my MR glasses?
-
Click on the Trainings tab.
-
Click on the add training button.
On the right, you will see a form for creating a training.
-
Fill the data and click Save as draft .
You will see the created lesson on the training page.
-
Click on the pencil icon to edit basic training information.
-
Click on the eye icon .
You will go to the editing training steps page.
Editing training content
In the web app, you can edit the content and names of the workout steps.
How do I edit the workout steps?
-
Click on the eye icon that is next to the workout that you want to edit.
You will see a list of lessons that have been created by the operator.
-
Click on the number of steps next to the lesson on the right.
You will see a list of steps and their description.
-
Click on the pencil icon to edit.
You will see the edit window on the right. You can now change the step name and instruction.
-
To save your changes click on Save changes .

Adding resources
Through the Web App, you can add resources (3D models in .glb format, graphic files in .jpg and .png format) to the library and send them to the operator.
How to upload files to the Web App?
-
Open the Resources tab.
You will see a list of uploaded resources.
-
Click on Add resources.
You will see the add recources window on the right.
-
Add a file name and click on Browse your files .
-
Select the file you wish to upload and click Save to save the file on the server.
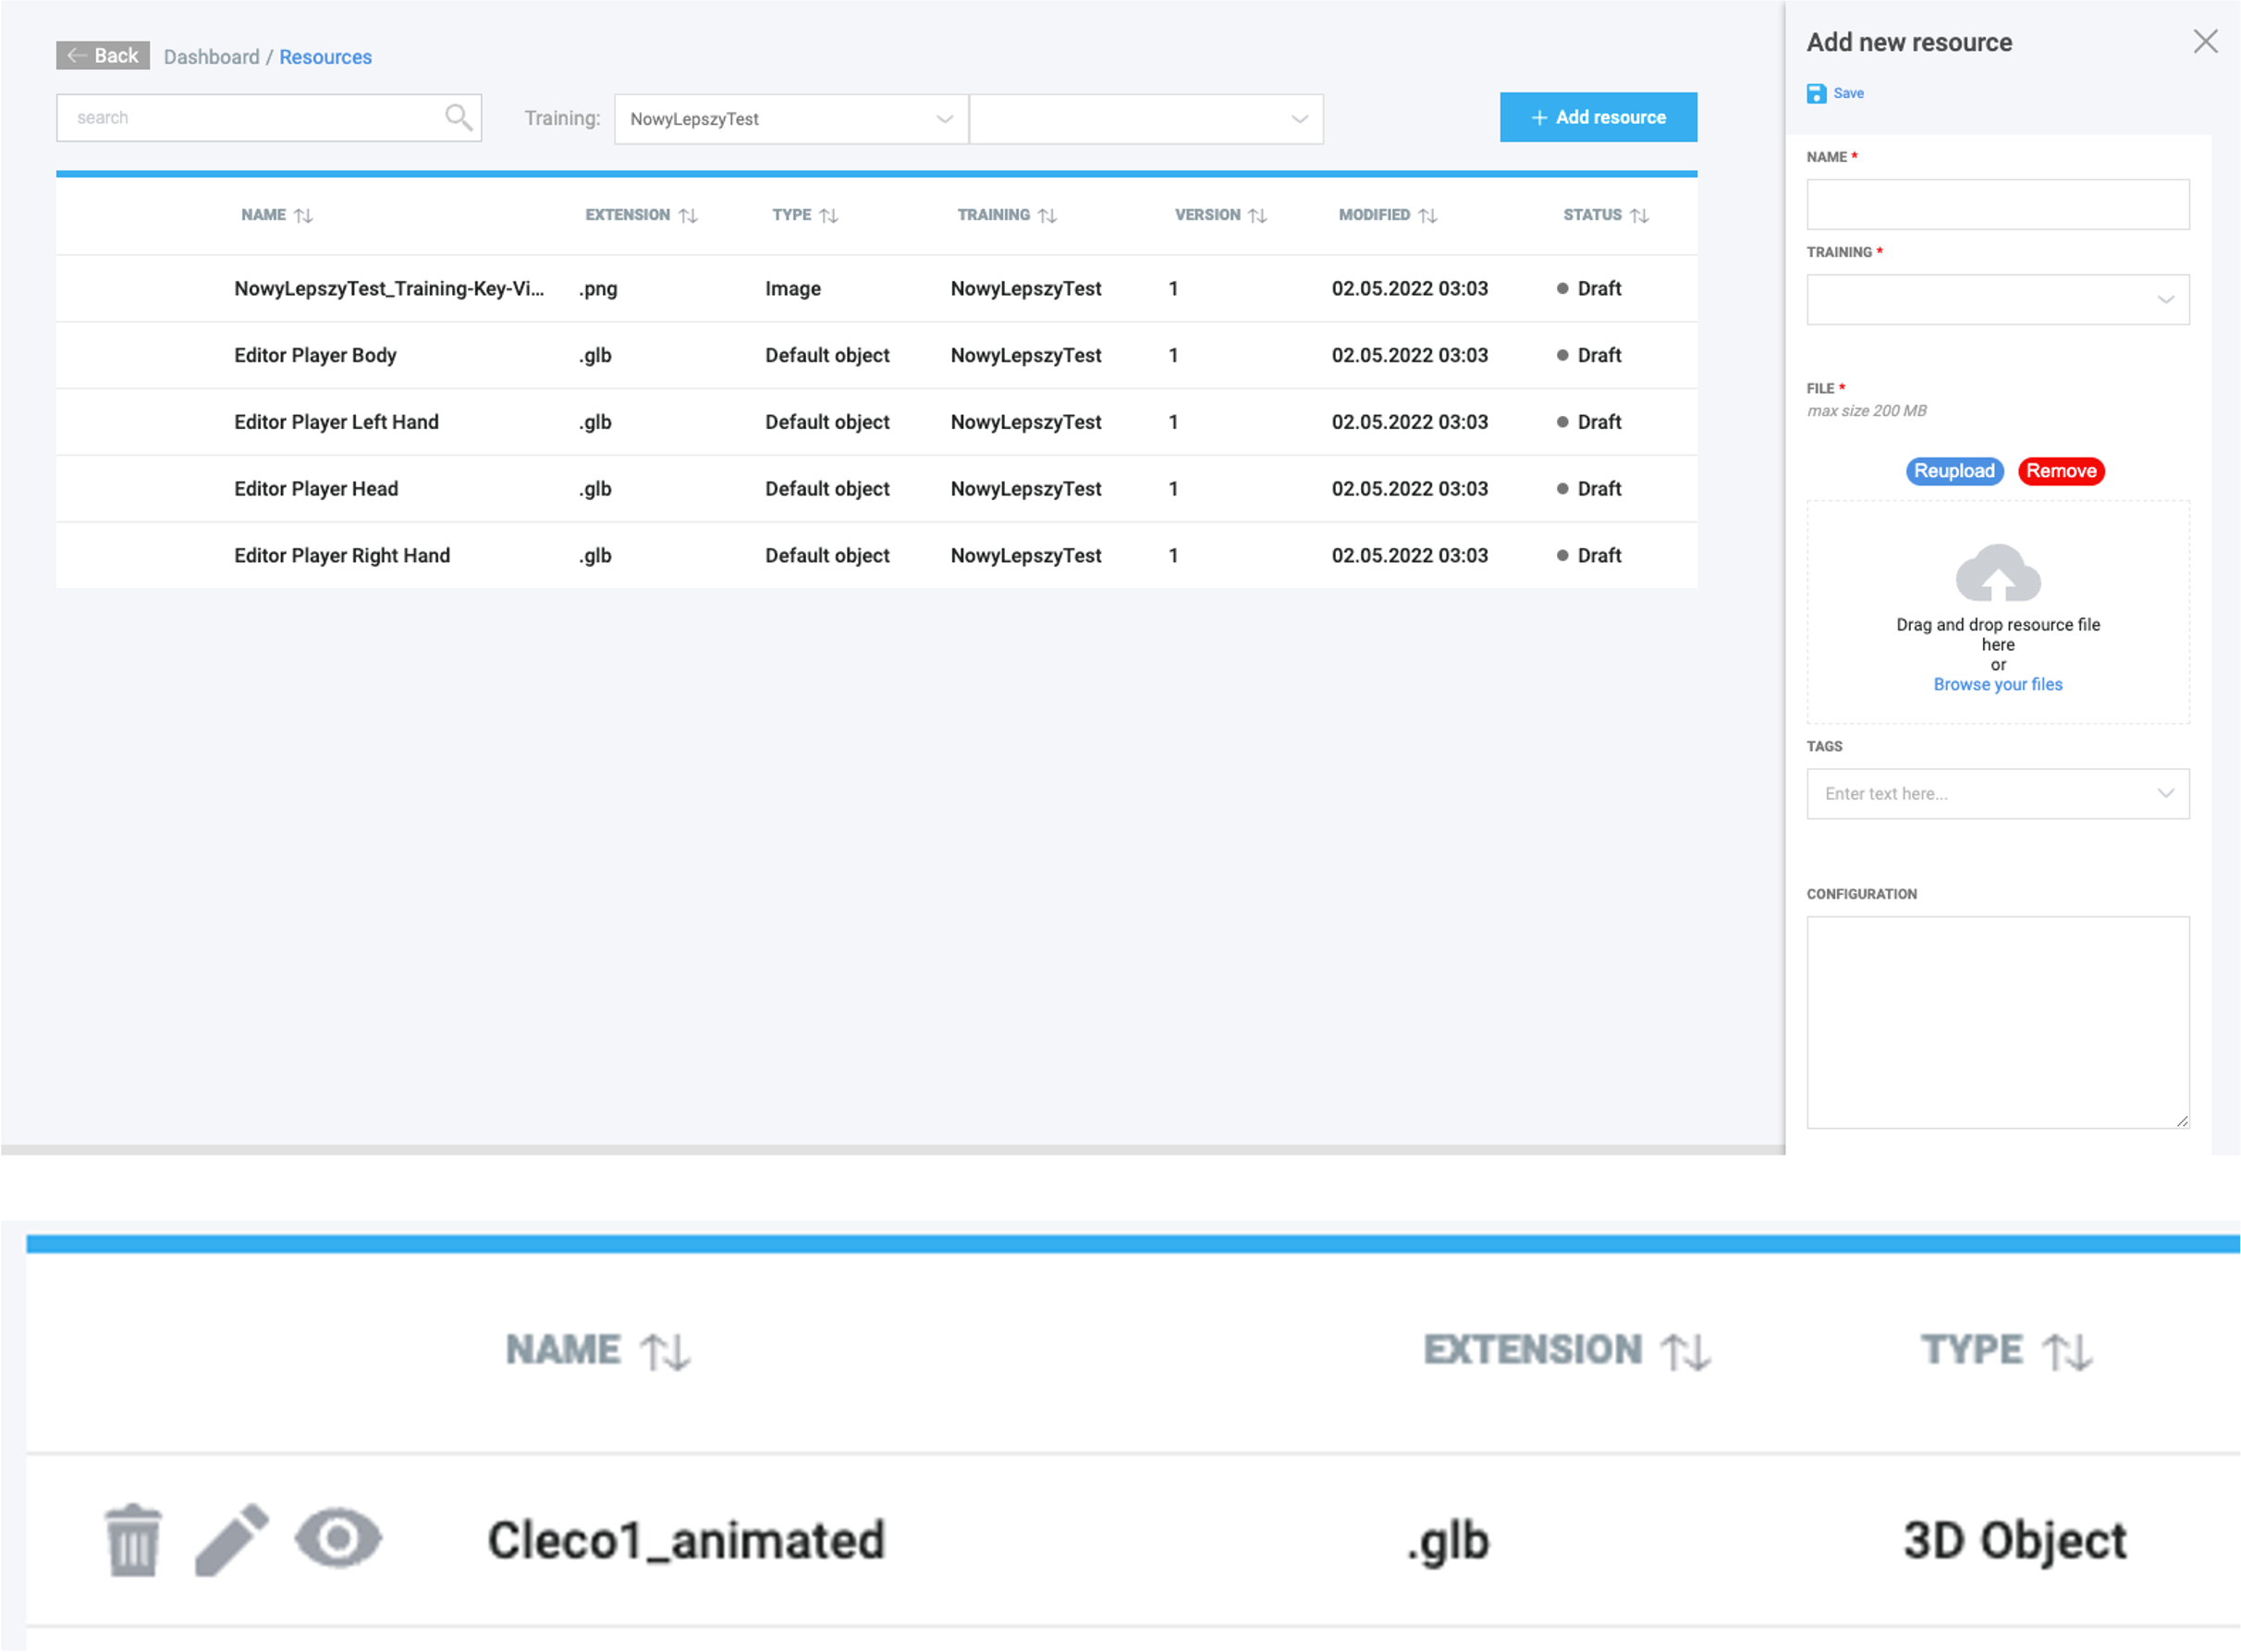
You can view or send the uploaded object by clicking on the eye icon next to the training,
edit the uploaded object by clicking on the pencil icon ,
or delete the uploaded file by clicking on the bin icon
Sending resources to MR glasses
Resources that are uploaded to the server via the Web App can be sent to the operator.
How to send resources to the operator?
-
Log in to Web App and MR Glasses App using the same login credentials.
After logging in, you should see the glasses icon next to the profile icon. It means that you are properly connected to MR glasses.
-
Go to the Resources tab.
You will see a library of uploaded objects (instructions on how to upload objects can be found in section 4.5).
-
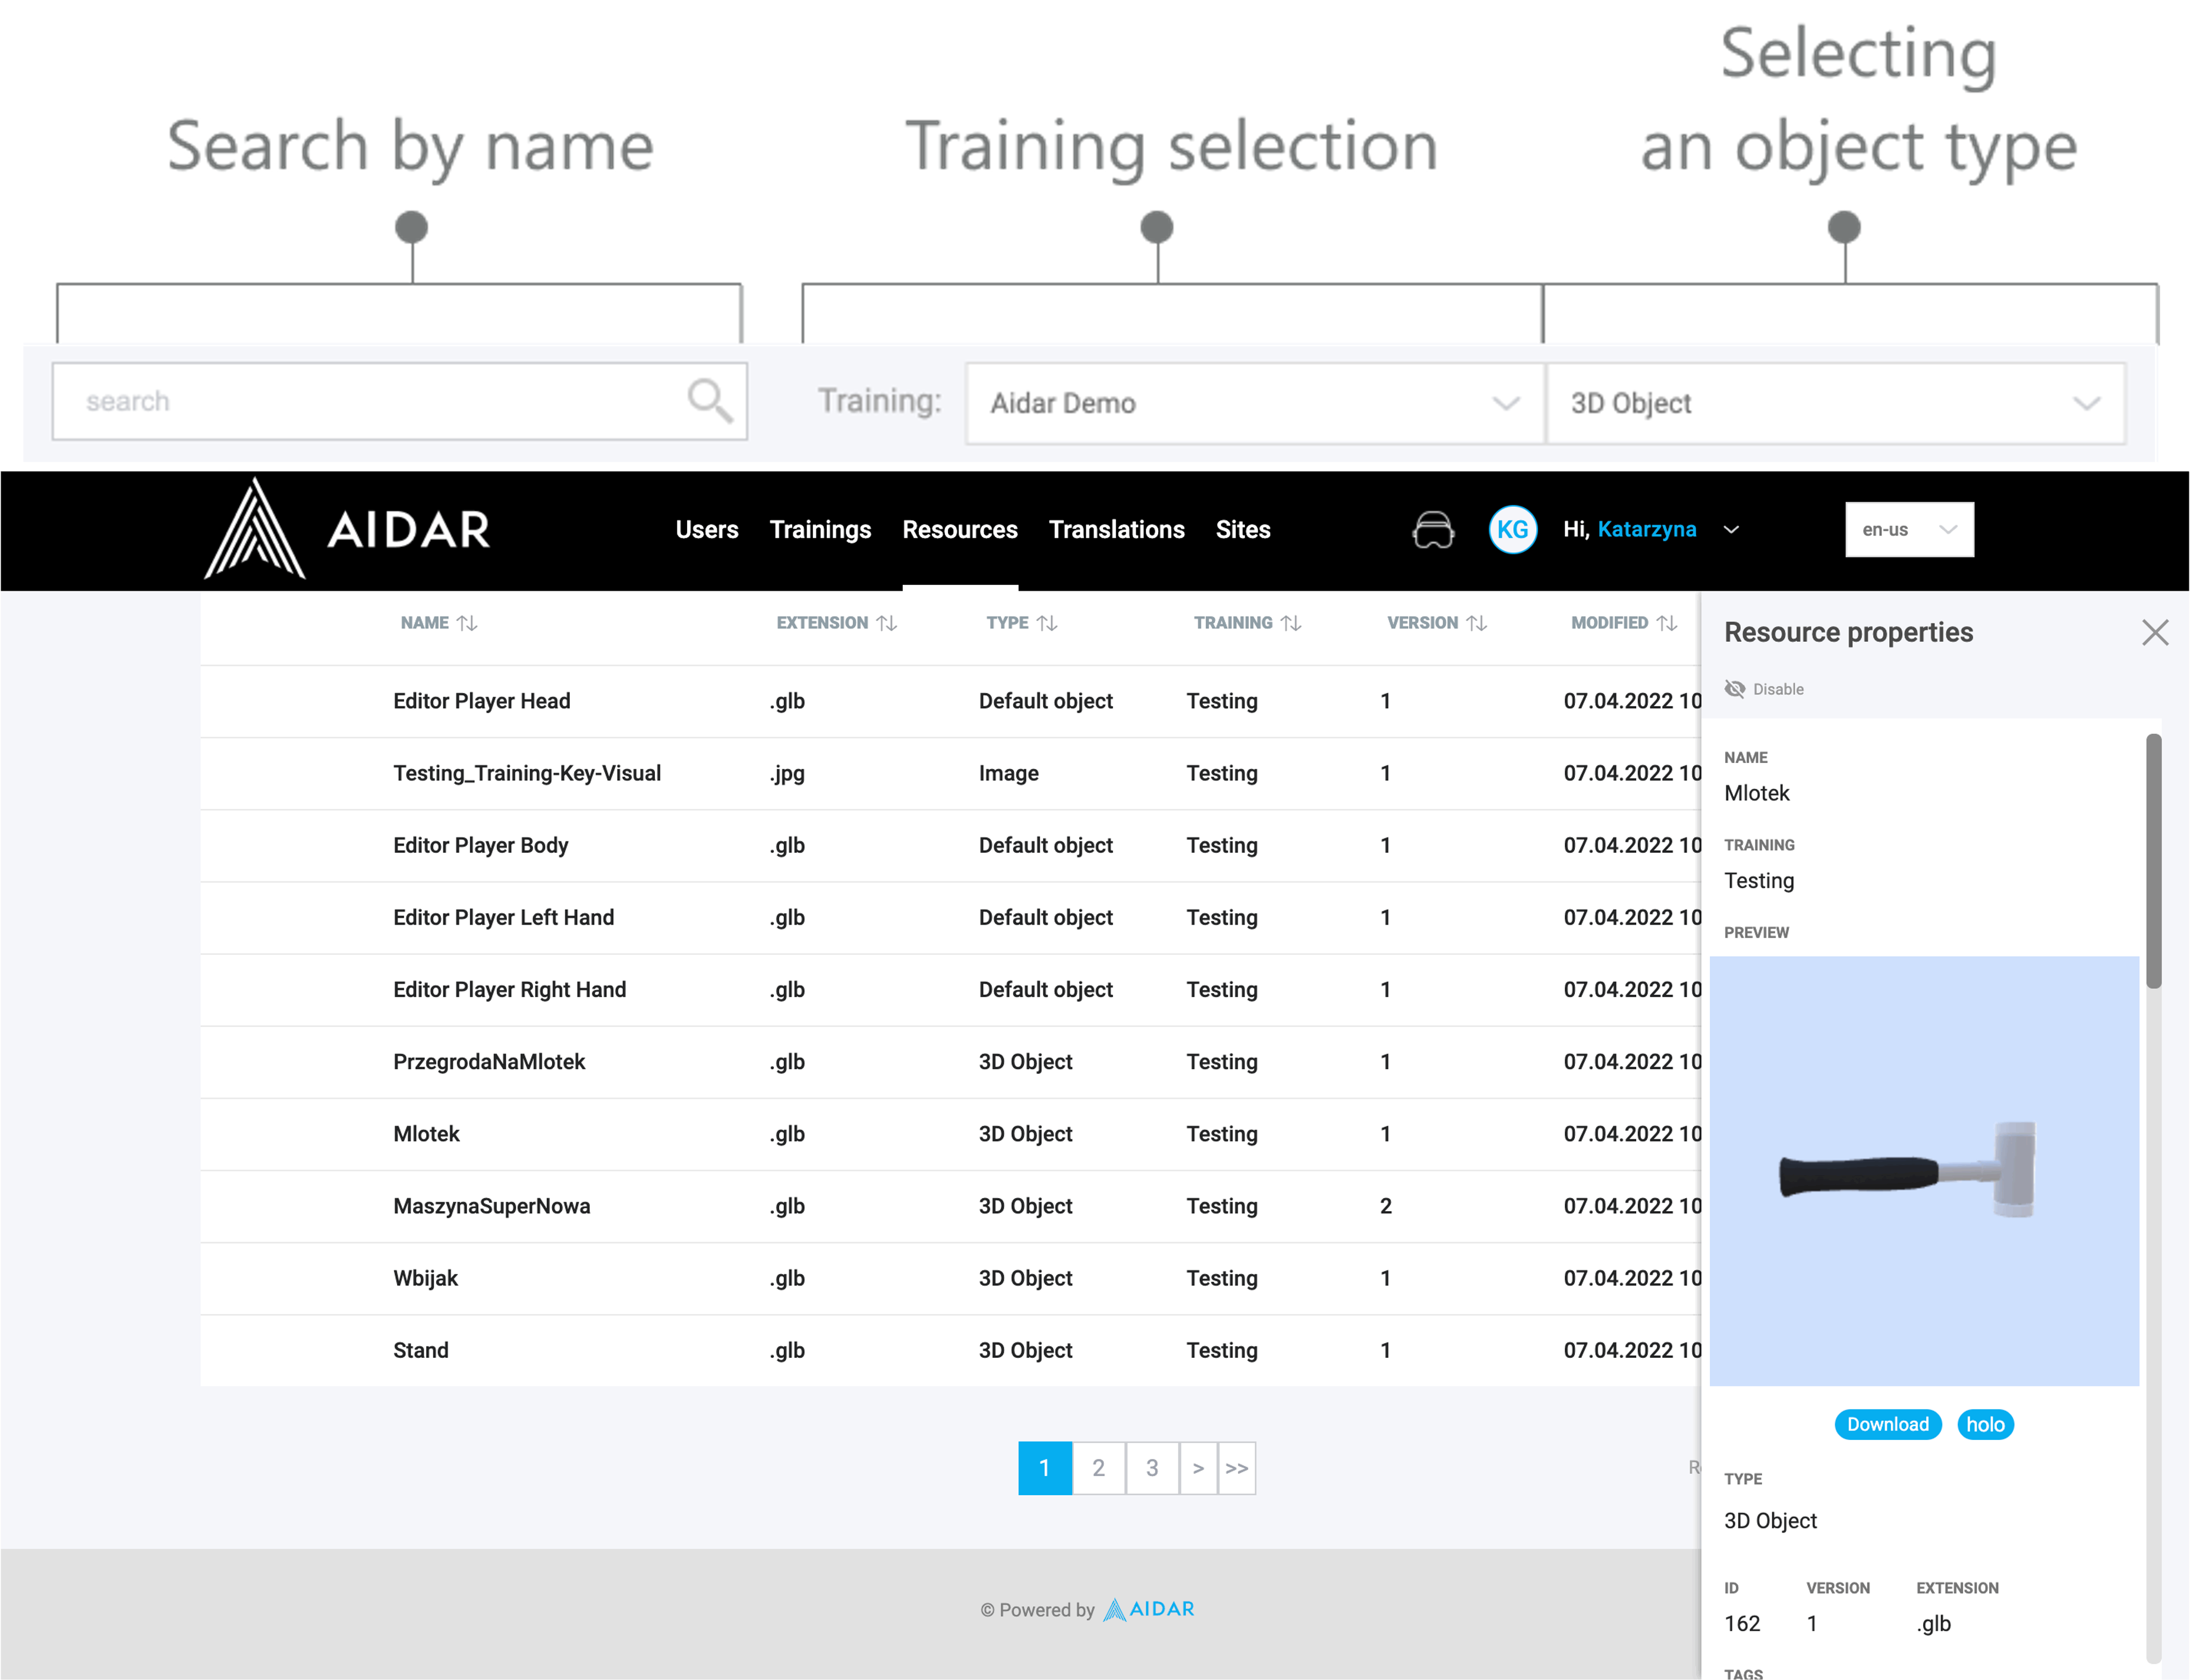
Click on the eye icon next to the selected object.
On the right you will see the object menu with object parameters and preview.
-
Click on the Holo button to send the selected object to the operator.
The operator will see a line leading to the object.
Note
To upload an object to the MR Glasses App you must be logged into the Web App and the MR Glasses App with the same account or you have to be on a call with the user to whom you want to send the object.
Whiteboard for online collaboration
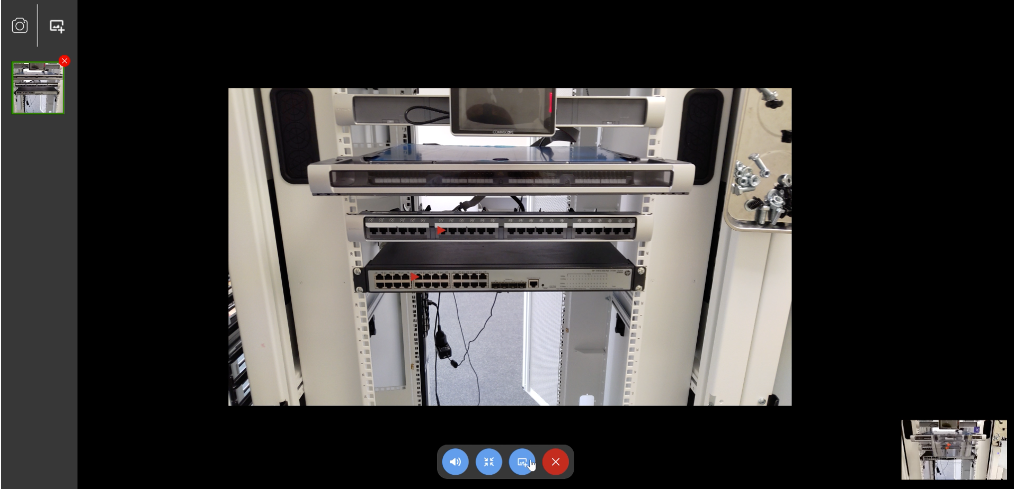
The expert can upload local photo from his computer (e.g. a scheme, a photo of the component, a map) or take a photo of what the operator sees and point out a detail in it.
How to work on a photos with an operator?
-
Click on the photo upload icon.
You will open a window designed to work on resources.
-
Then click on one of the icons on the left:
-
take a photo of what the operator sees
-
upload local photo (.png or .jpg format)
-
The operator and the Expert will see the photo in front of them. You can now add indicators on it which you will both see.
Translate trainings
The Web App allows you to quickly translate your trainings into other languages.
How to translate a training to another language?
-
Click on the translations tab.
You will see a list of created trainings
-
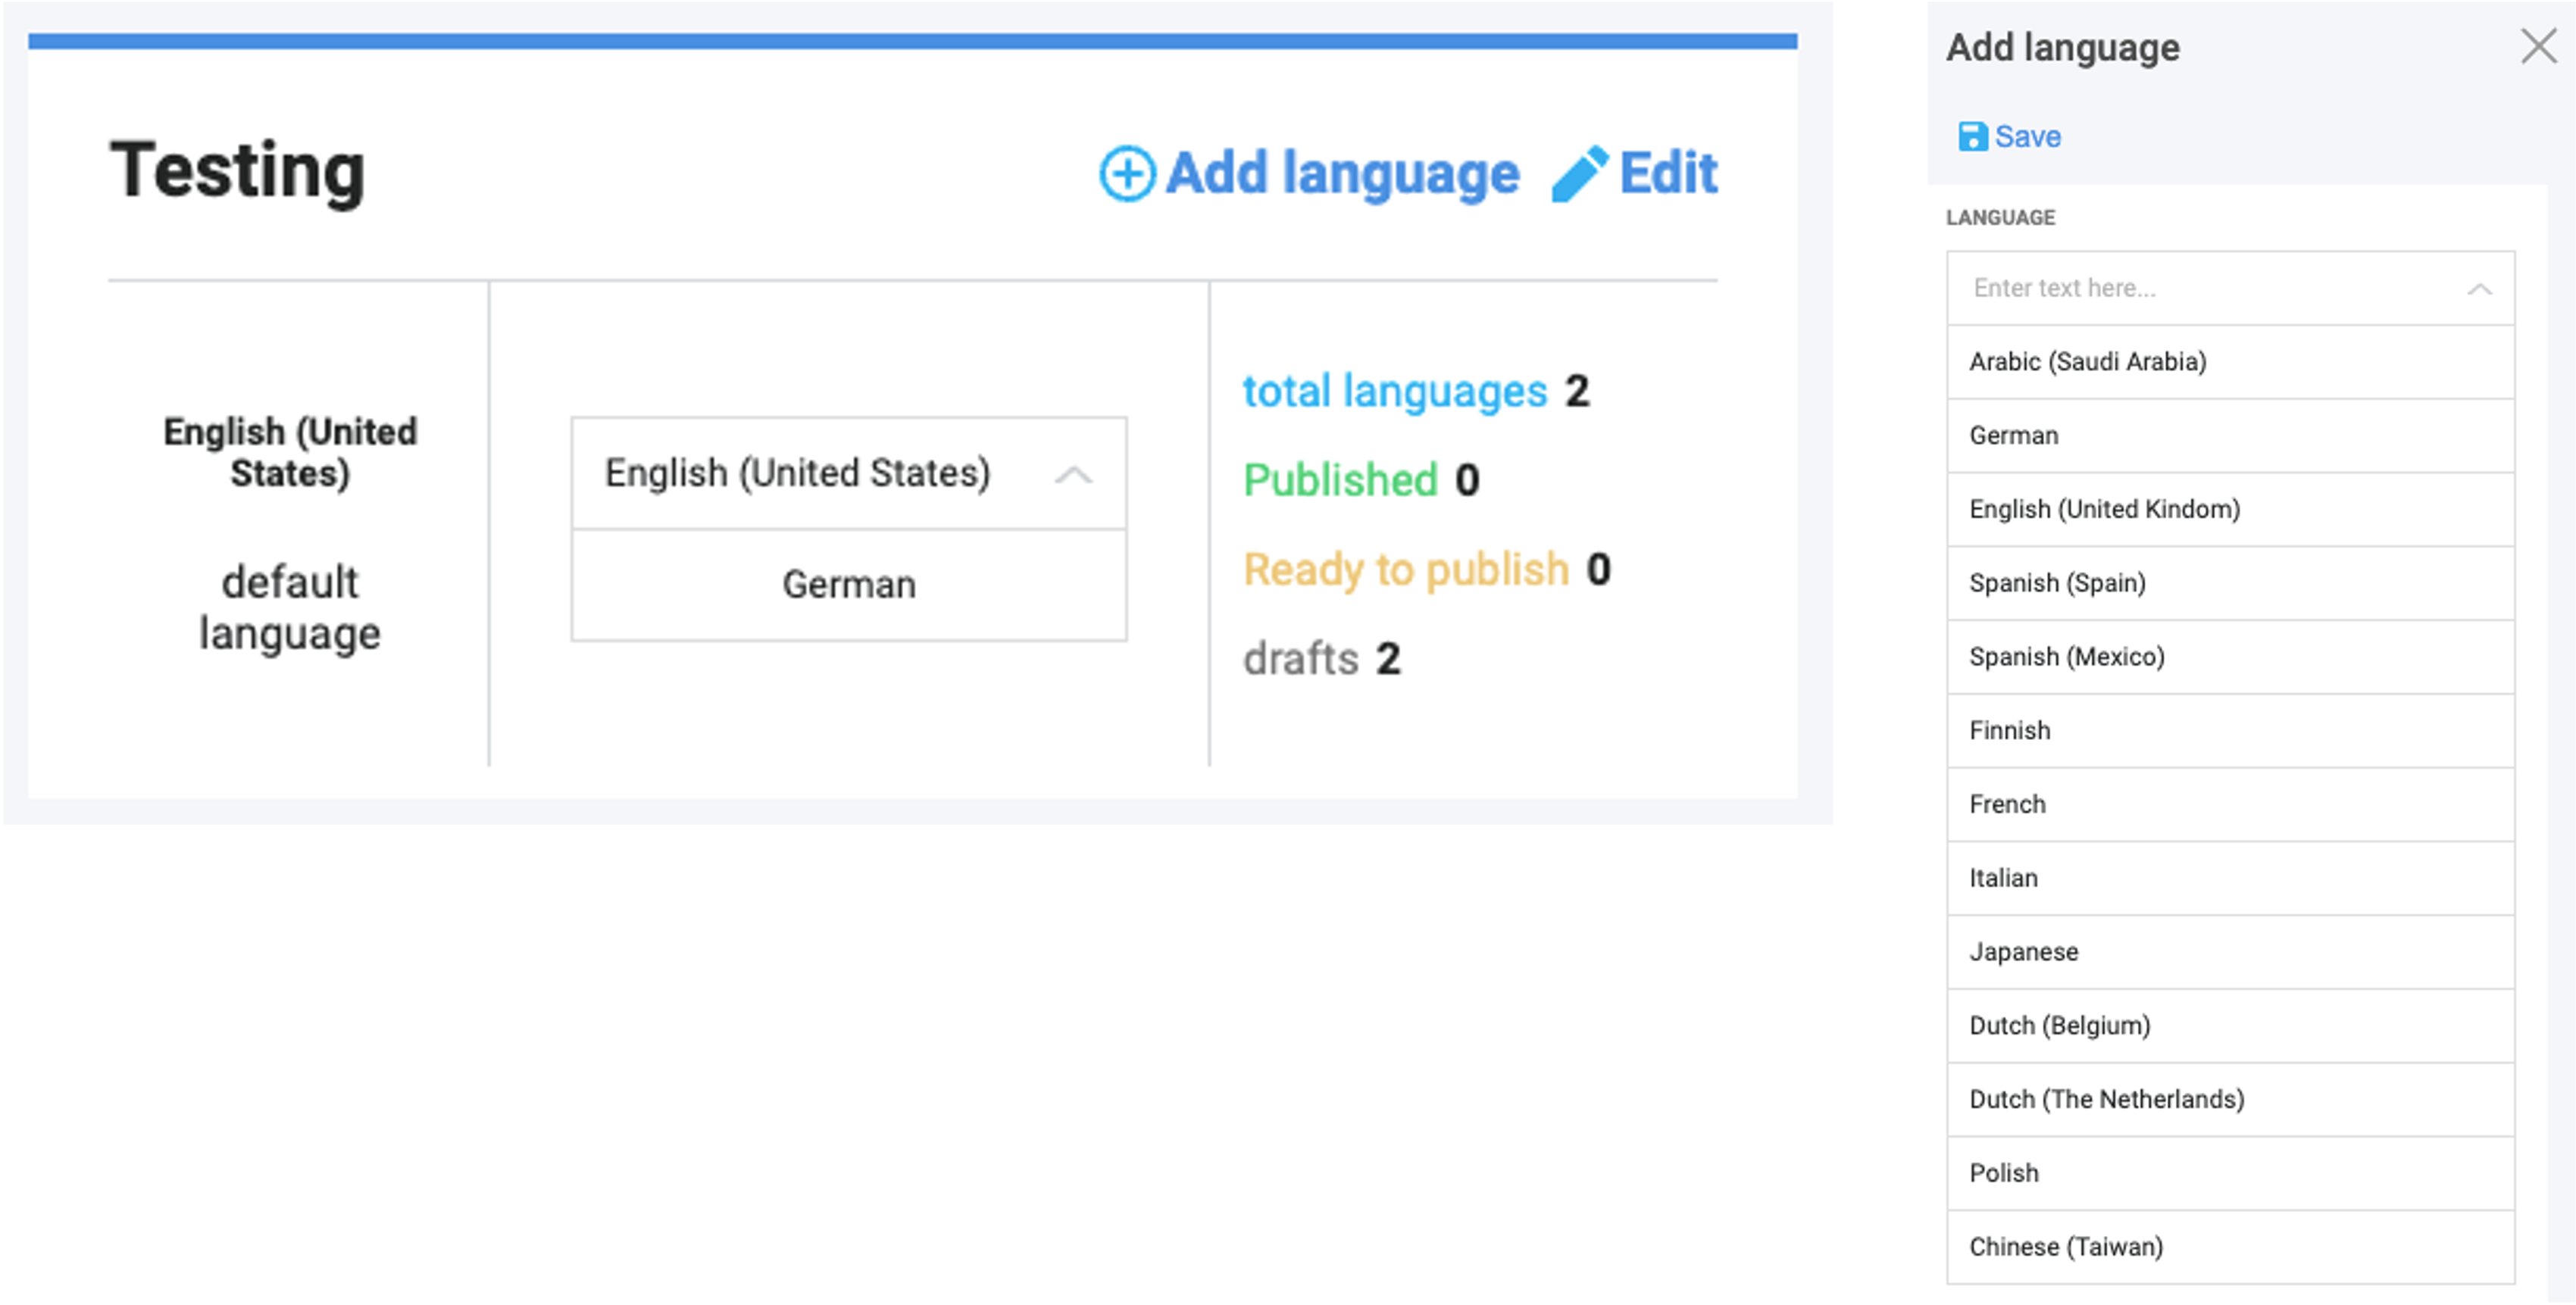
Next to the training in which you want to change language click + Add language.
On the right you will see a window to add language.
-
Select the language and click Save.
-
To add a language to your workout click on the original language in the workout language and select the language you added.
-
Click on Edit.
You will be taken to the list of workout steps.
You can add a translation of the content of the steps in an additional column.
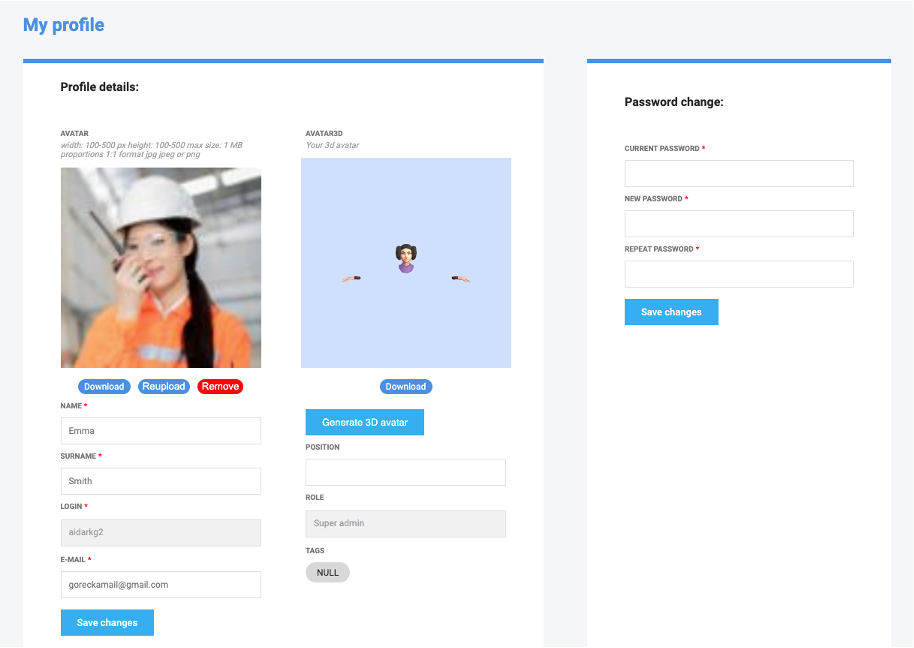
Upload avatar and generate 3D avatar
The Web App allows you to change the appearance of the operator avatar. The operator avatar is visible in the 3D mesh that the technician sees.
How do I change the operator avatar?
-
Click on your profile icon in the upper right corner of the web app.
-
Click on My profile.
You will be redirected to the edit your profile page
-
Click on Generate new avatar.
The avatar wizard will be launched.
-
Go through the steps to create an avatar and click Save changes.
![]()