Building a training
Training tracks
Training tracks is the space where you create lessons and arrange their logic.
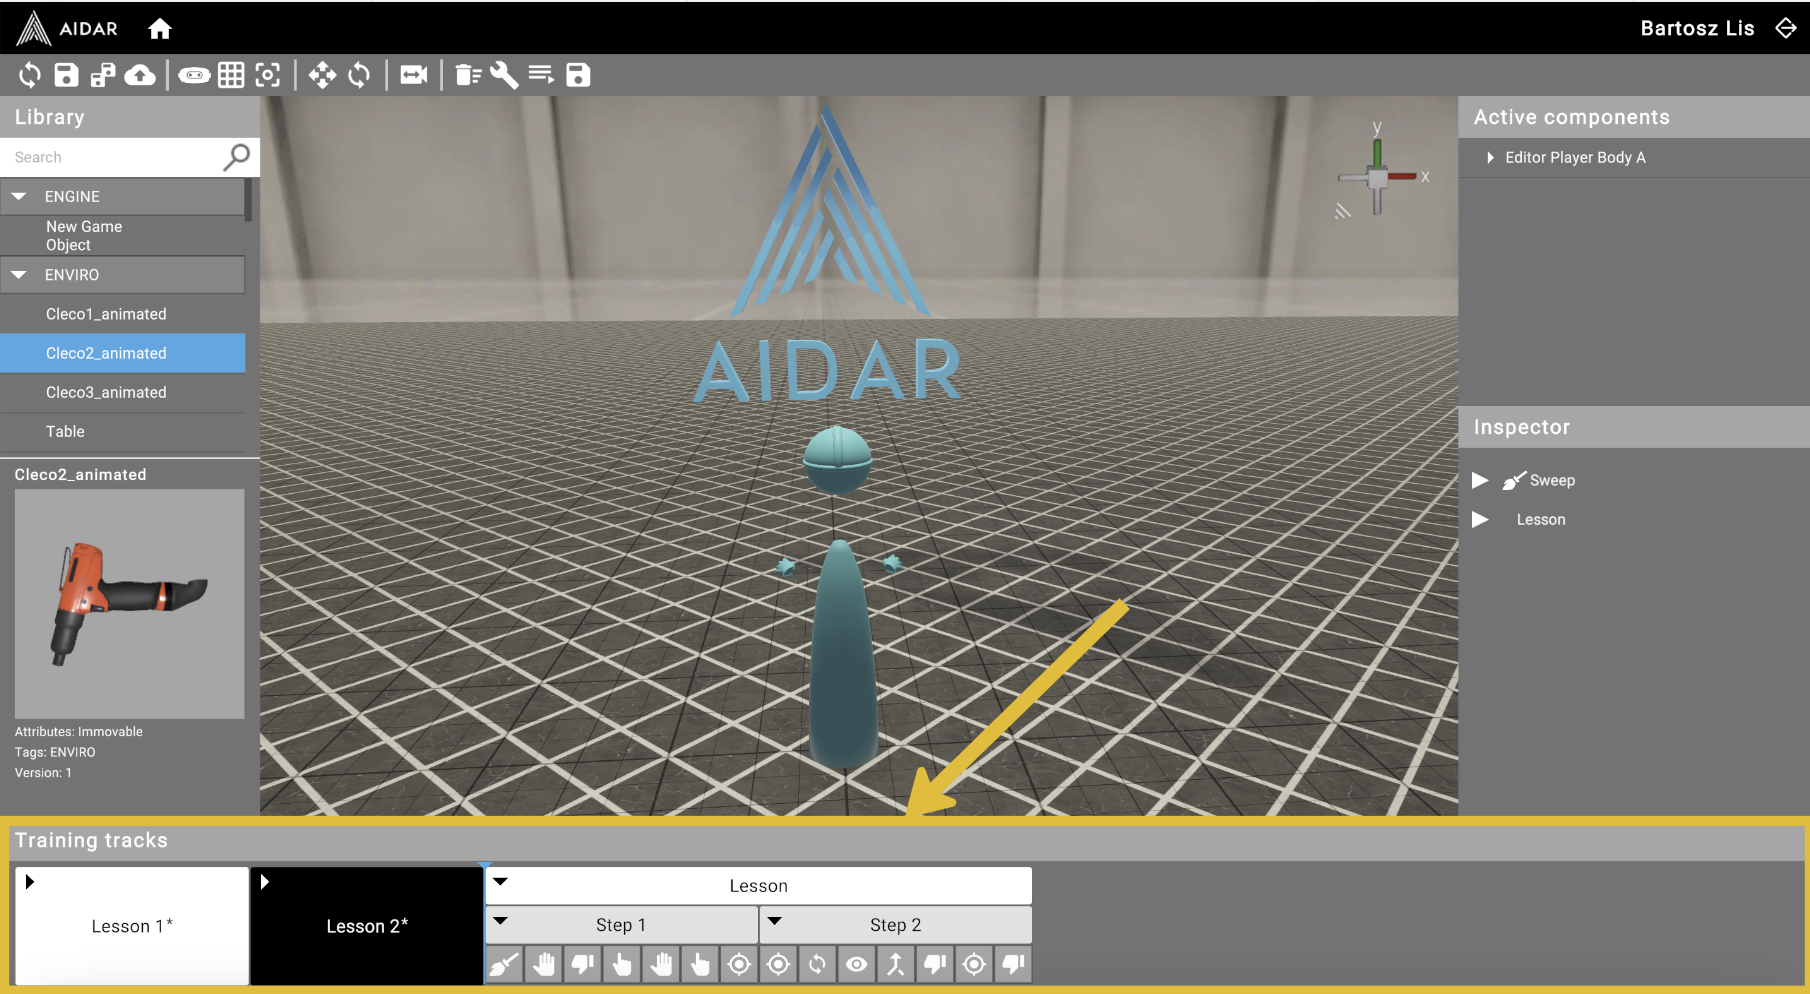
Each lesson contains Steps (lesson stages) and Substeps (individual actions that the trainee must perform).
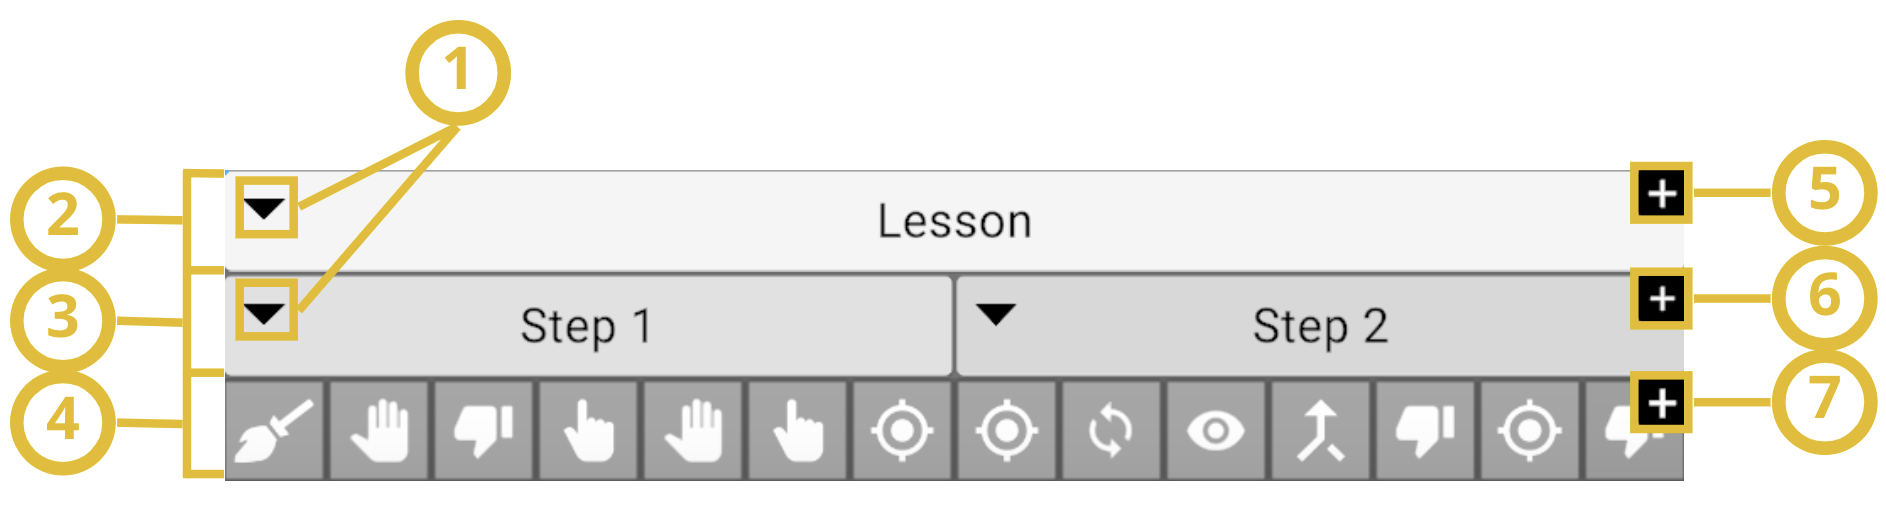
(1) Expand Lesson/Step content
(2) Lessons
(3) Steps
(4) Substeps
(5) Add new Lesson
(6) Add new Step
(7) Add new Substep
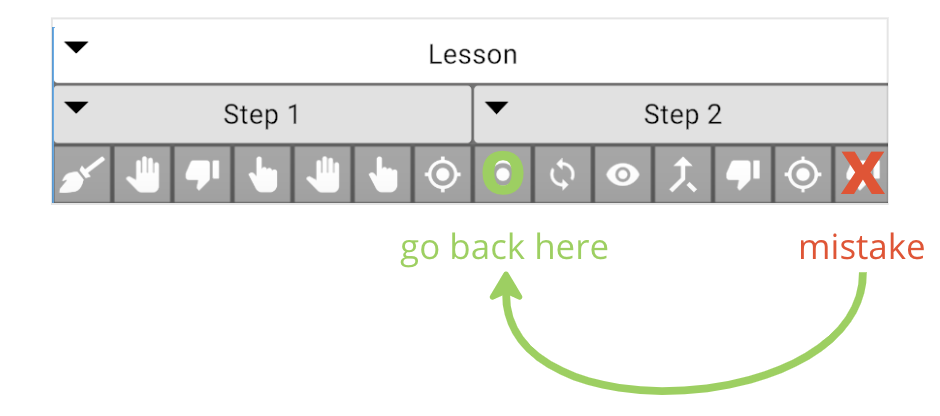
Dividing a lesson into Steps is convenient if you don't want the trainee to go too far back after making a mistake.
Example
A lesson has 2 Steps, with 7 Substeps each. If the trainee makes a mistake in the 7th Substep of the 2nd Step, they will be taken back to the 1st Substep of the 2nd Step (not the very beginning).
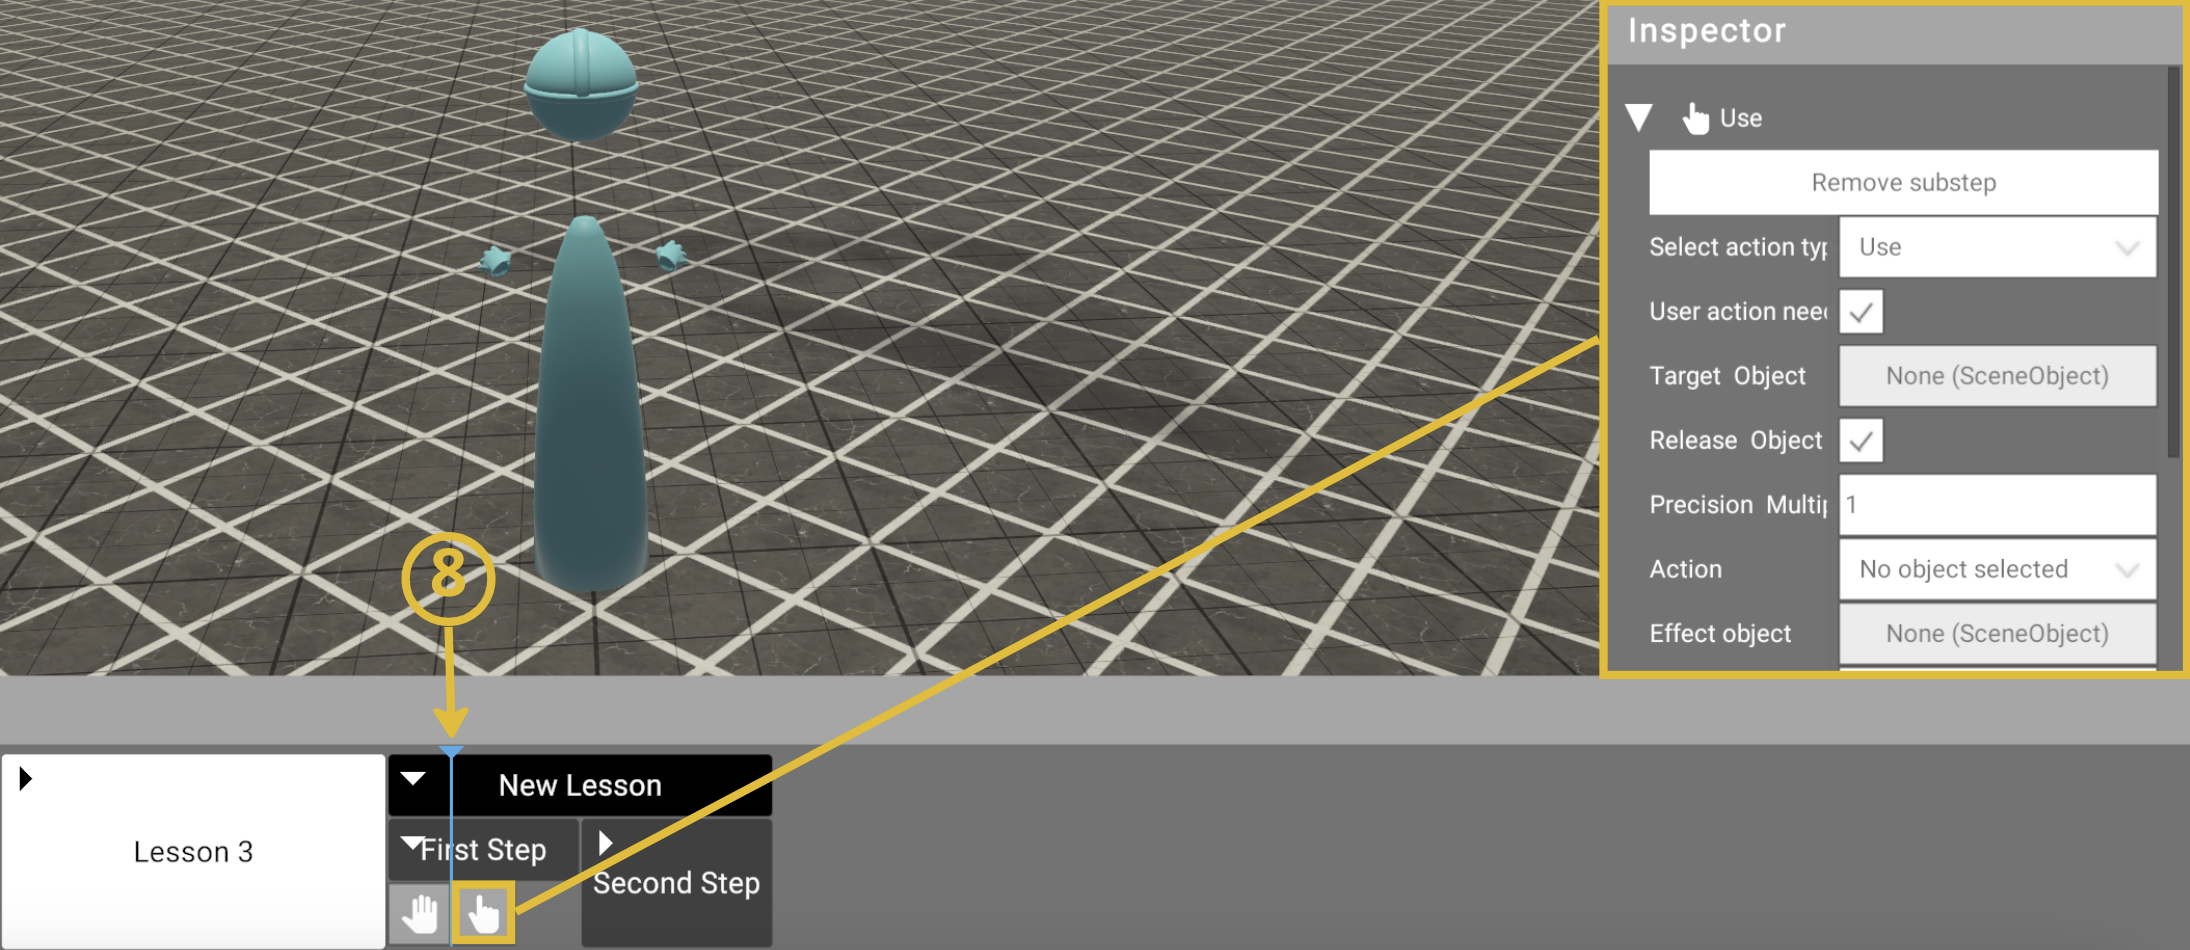
Left-click on any Substep to edit it in the Inspector. The blue line (8) on the training tracks indicates which substep you are currently editing.
Lesson creation (example)
In this example, we'll create a simple action to pick up a Cleco tool from the tool cart and place it on the table. After setting up the scene (Check details):
-
Left-click on the newly created substep (1). Its settings will appear in the Inspector.

-
Select the Pick action (1) in the Inspector.

-
Assign the target object. You can do this in two ways:
Drag and drop: From the active components list, left-click and hold the 3D object (1) and drag it (2) to the Target Object field in the Inspector.

Object picker: Left-click the Target Object field (1) to open the object list, select the object (2) and click OK (3).

-
Add the Release action. Hover over the first substep and click + (1) to add a new substep.

-
Left-click on the new substep (1). The blue line (2) will move to indicate the active substep.

-
Select the Release action and assign the target object (the table) using the same method as step 3.
Substep types
Each substep defines an action the trainee must perform. The following types are available:
Movement & Placement
| Type | Description |
|---|---|
| Pick | Pick up one or more objects. Set the target object and quantity. |
| Release | Release the held object at a specific location. Supports auto-positioning and parent assignment. |
| Move | Move an object to a target position. Supports precision, parent assignment, and animation. |
| Rotate | Rotate an object by a specified angle. |
| Push | Push an object (e.g., a button). |
Tools & Interaction
| Type | Description |
|---|---|
| Use | Interact with an object using an action (e.g., open, close, toggle). |
| UseTool | Use a held tool at a specific position (e.g., tighten a screw). Set duration and target position. |
| Hit | Strike an object with hand or tool at a specified hit zone. |
| LookAt | Look at an object for a specified duration. |
| Check | Inspect/check an object for a specified duration. |
| Sweep | Perform a sweeping motion on an object within a defined zone. |
Advanced
| Type | Description |
|---|---|
| Wait | Wait for a specified duration before proceeding. |
| Aggregate | Group multiple actions to execute together. |
| GCode | Execute GCode machining operations. |
| Presentation | Display an interactive presentation. |
| AvatarAnimation | Play an avatar animation. |
| ExecuteLua | Execute a custom Lua script. |
| MediaPlayer | Play video content (supports Video, 3D SBS, 3D 180, 3D 360 formats). |
Common substep properties
All substeps share the following properties:
- Instructions - text displayed to the trainee explaining what to do
- Best time - target completion time for the substep
- Effect Object / Effect - optional visual/audio effect when the substep is completed