Building a scene
Building a scene is a key part of creating a new lesson. The scene is the environment made of 3D objects in which the lesson takes place, along with all objects that the user will interact with.
Player Body - starting position
By default, only one object (Player Body) is placed on the scene of a newly created training. Player Body defines the starting position and orientation of the trainee in VR.
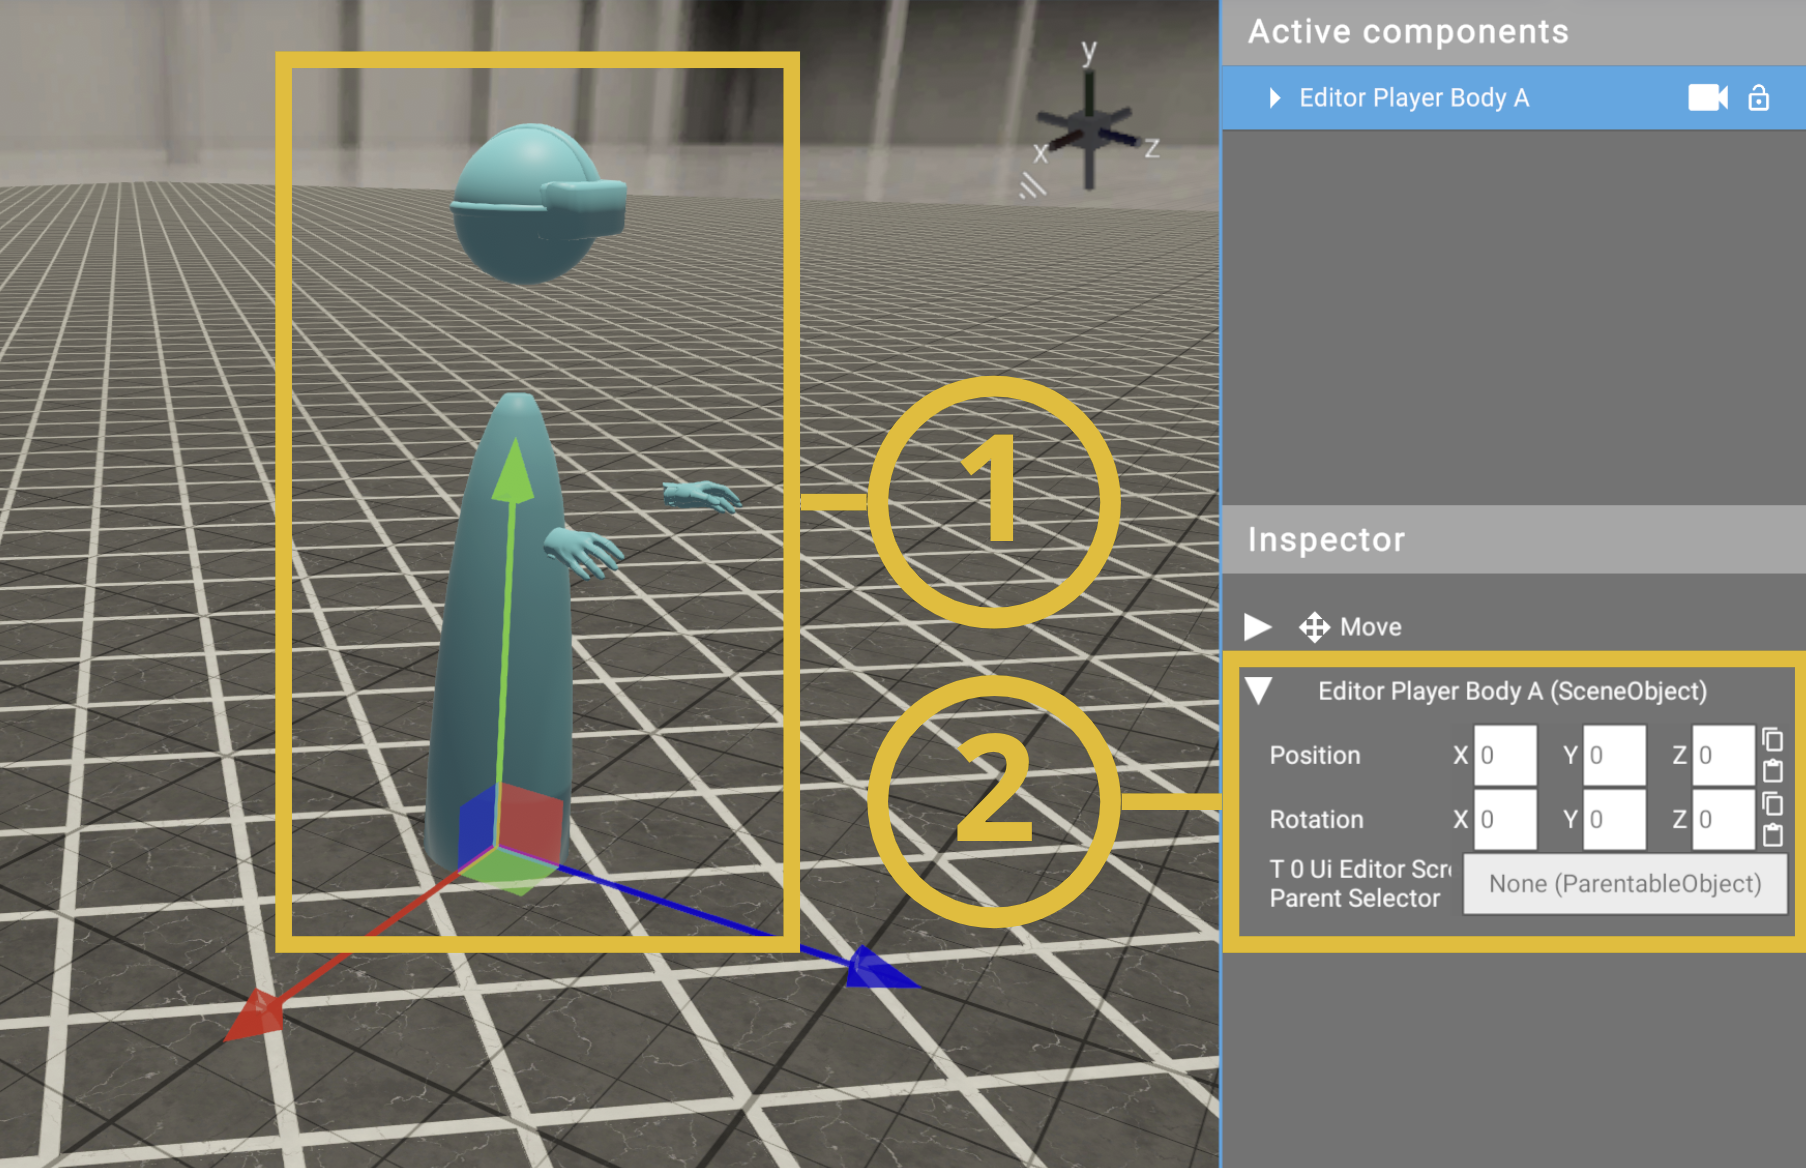
(1) Player Body
(2) Position on the axis
By default, the Player Body is located at position X: 0, Y: 0, Z: 0.
We recommend that you change the position of the Player Body before you start creating the scene. This will increase the visibility of newly added resources.
Tip
Check viewport navigation to learn how to navigate the 3D workspace and position objects.
Adding 3D objects to the scene
-
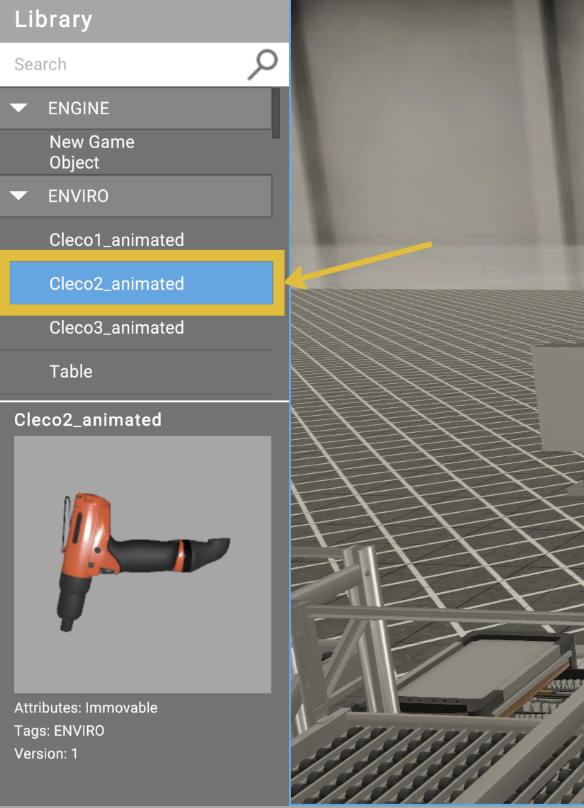
To add a 3D object to the scene, select and double left-click a resource from the Library.
Note
Add resources through the Web App. Check details - adding new resource.
Tip
Left-click on a resource to see a preview before adding it to the scene.
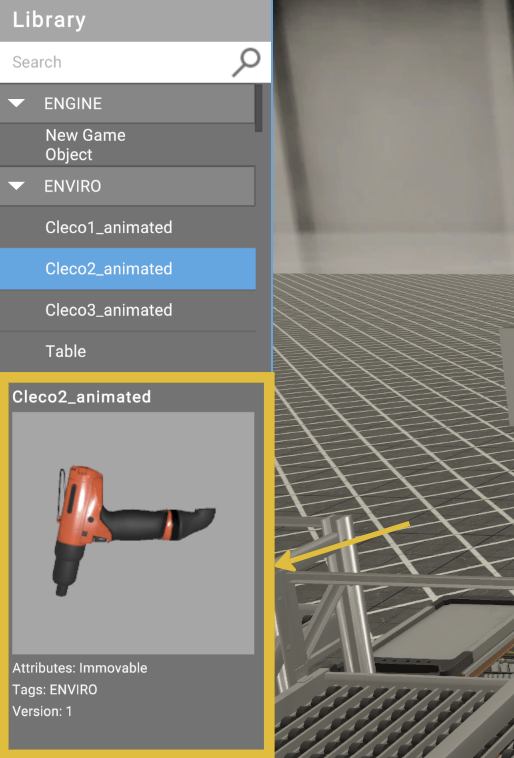
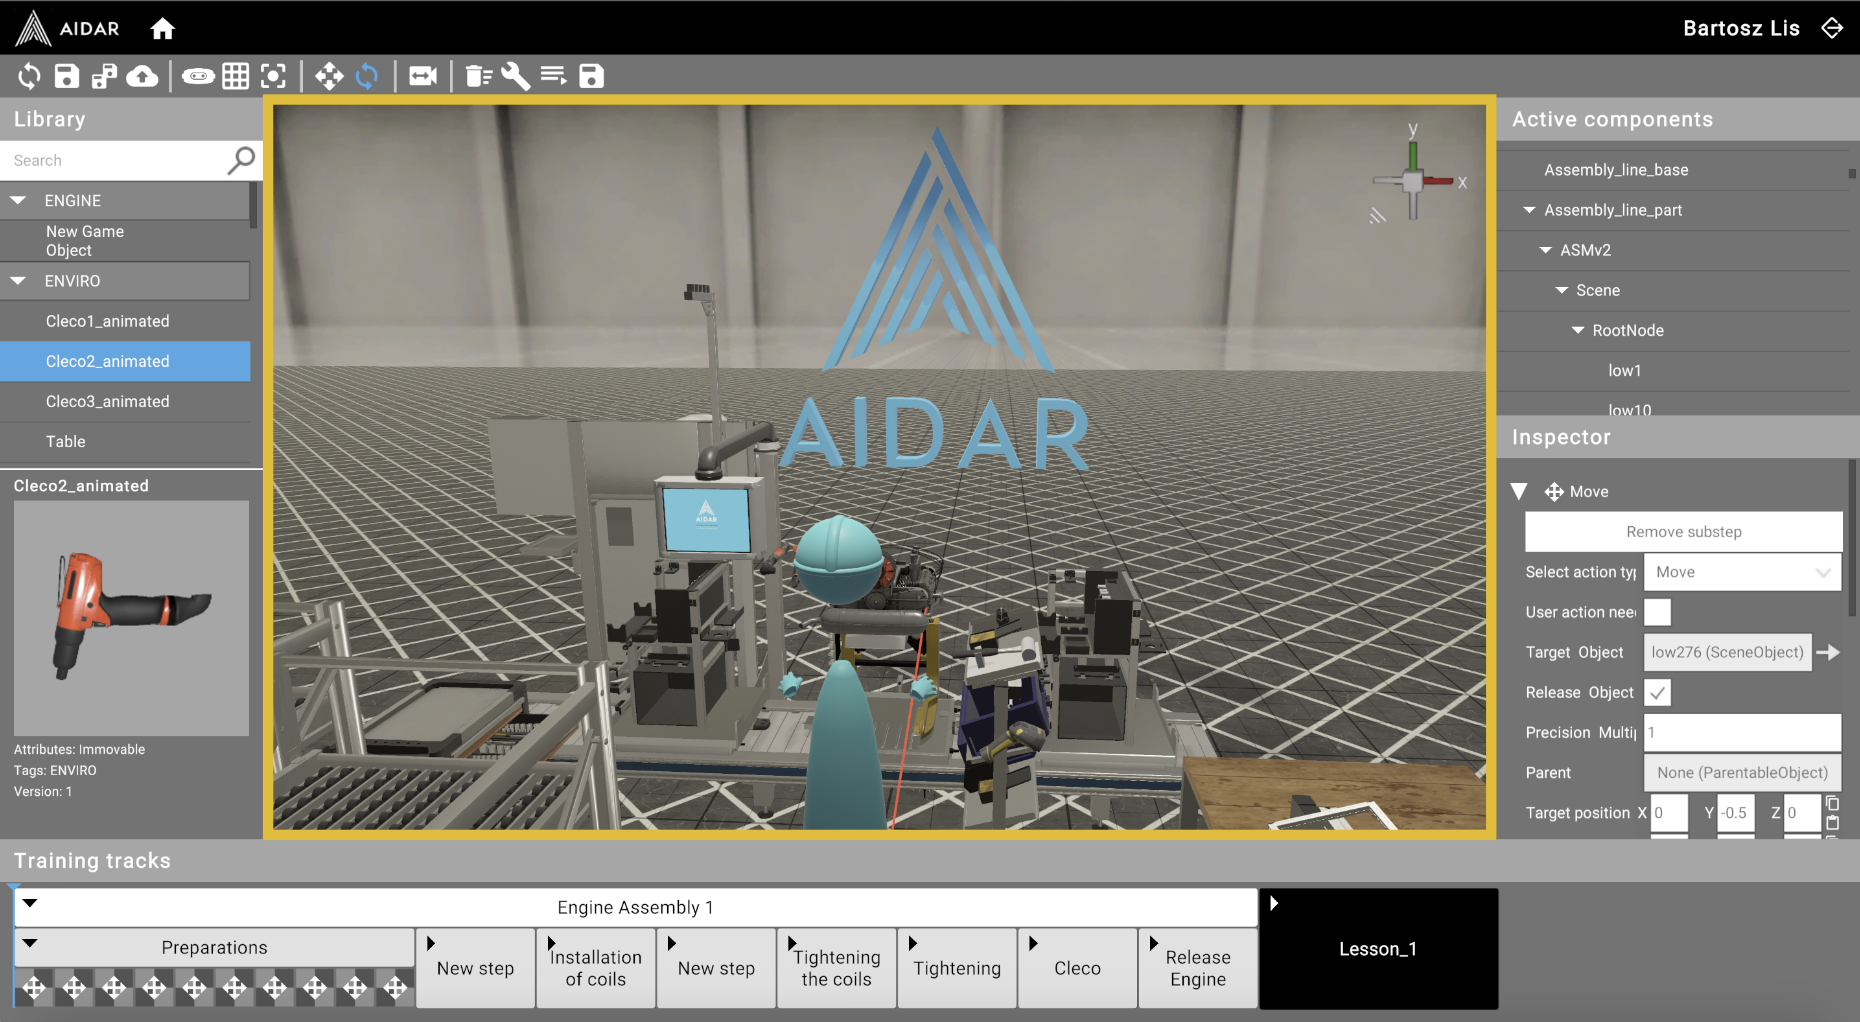
When the resource is added, it will appear in the Active Components list and on the scene at position X: 0, Y: 0, Z: 0.
-
Change the position and rotation of the object and place it in the desired location.
If you can't find the object on the scene, double left-click the resource in the Active Components list to center the camera on it.
You can reposition the object in two ways:
-
Manually in the viewport using gizmo handles. Check details
-
By typing exact X, Y, Z values in the Inspector.
Add all the objects you need to the scene in the same way.
-
Removing objects from the scene
You can remove objects from the scene in two ways:
- Select the object and press the Delete key.
- Select the object and click the Remove button at the bottom of the Inspector panel.
Scene object properties
When you select an object on the scene, the Inspector panel shows its properties:
- Position and Rotation - the object's local transform values
- Parent - assign a parent object (the object will follow the parent's transform)
- Default Animation - select an animation to play by default (if the model contains animations)
- Loop Animation - toggle whether the default animation loops
- Image Scale - scale factor for image planes (only visible for image objects)
- Override Shaders - apply custom shader effects to the object
- Lua Scripts - attach event-based scripts to the object:
- On Init - runs when the object is initialized
- On Touch - runs when the object is touched
- On Grab - runs when the object is grabbed
- On Release - runs when the object is released
- On Collision - runs on physics collision
- On Trigger - runs on trigger enter
- On Click - runs on click interaction
Viewport navigation
The 3D viewport is where you arrange the scene of the lesson.
Select
Left-click any object to select it. Left-click empty space to deselect.
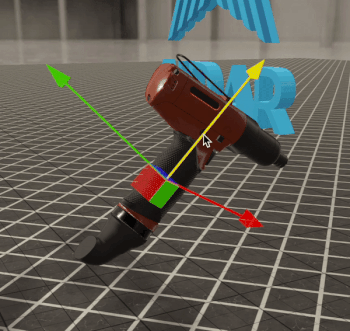
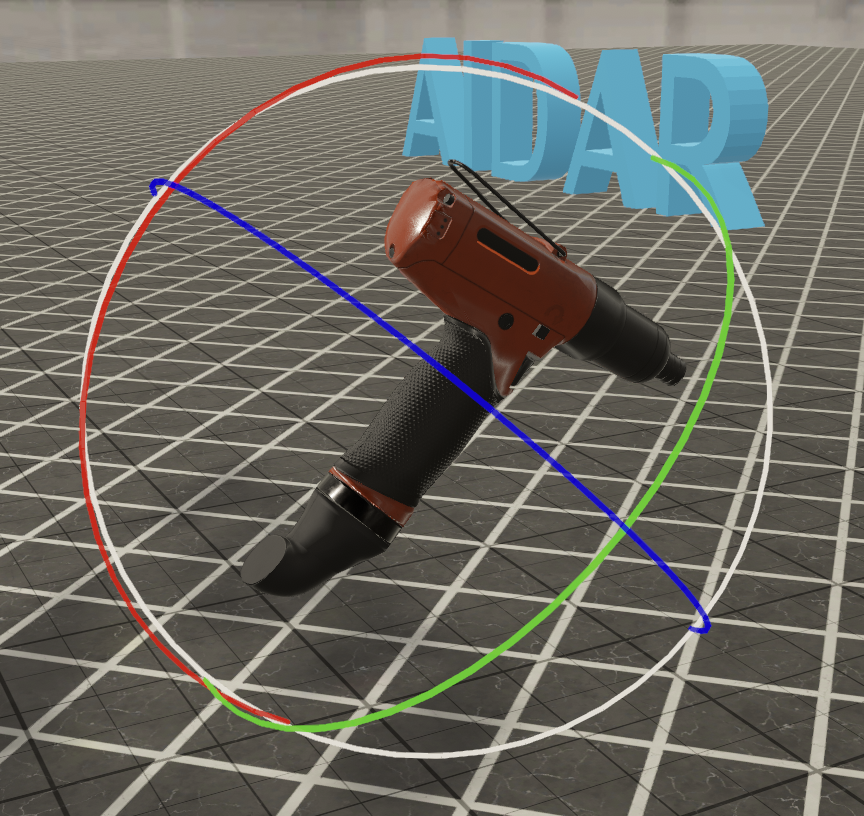
Rotate/change the position of the object
After selecting an object, you can rotate it or change its position on the scene. Use the shortcuts R (position mode) and T (rotation mode) to switch between modes.
Position mode (R)
The arrows indicate the axis along which you will move the object. Left-click and drag one of the arrows or one of the plane handles to move the object.

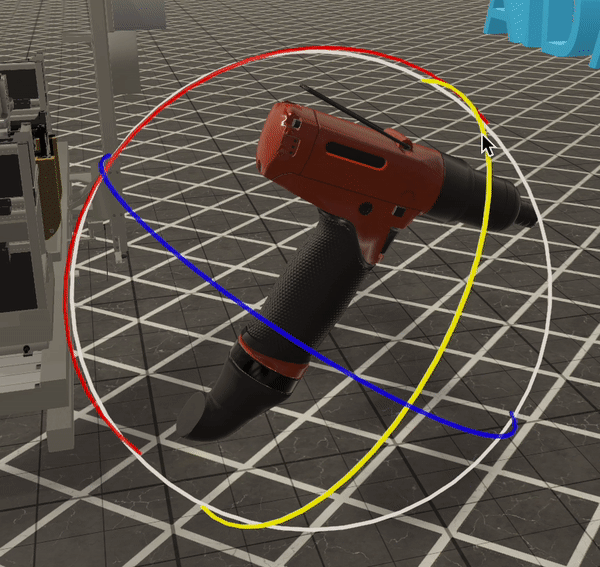
Rotation mode (T)
To rotate an object, click and drag one of the circular axes. You can also left-click and drag the object freely to perform unconstrained rotation.
Tip
You can also change the position of the object by typing exact values in the Inspector.
Rotate view
In the upper right corner of the viewport is a gizmo with axes (1).
Left-click on one of the coordinates (X, Y, Z) to snap the view to that axis.
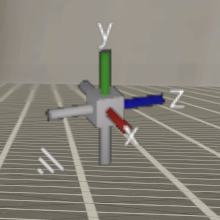
If you left-click on the cube center (2) you will switch between perspective and orthographic view.
Right-click and drag to rotate your view from any cursor position.
Use A (left), D (right), Q (down), E (up) to move the camera and change the pivot point.
Zoom
Use the scroll wheel or W (forward) / S (backward) to zoom.